-
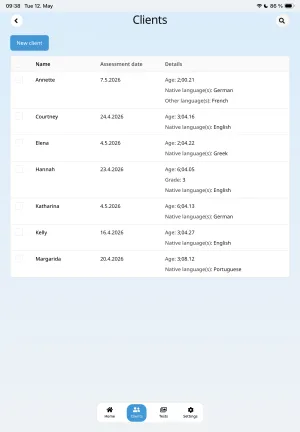
From the Clients screen, select the client whose data you want to report on.
-
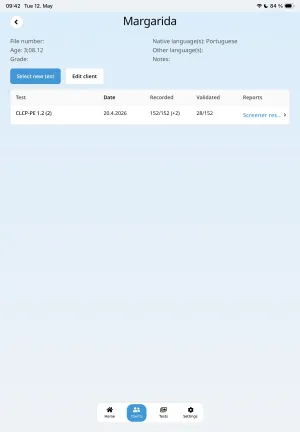
Tap the relevant session in the list to highlight it.
-
Select View Data (bottom-left) to open the Records & Reports screen for that session.
-
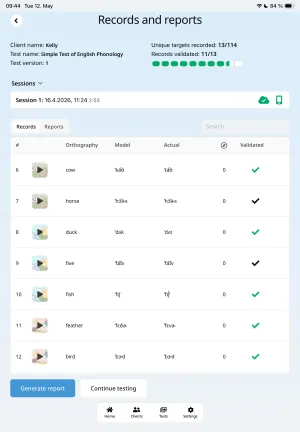
On the Records & Reports screen, tap Generate Report (bottom-left).
-
The Select Report Sections pop-up will appear, allowing you to choose which sections to include.
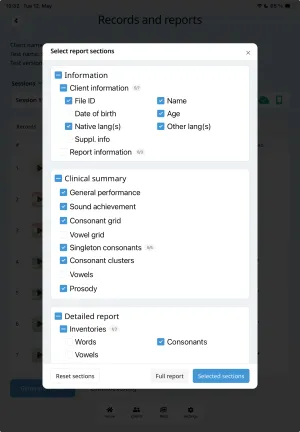
- Report Header: Contains client information
- Clinical Summary: A concise overview of the report’s findings
- Detailed Report: All available data from the session
At the bottom of the pop-up, you’ll see three options:
- Reset: Clear your current selections
- Full Report: Include every section
- Selected Sections: Generate a report using only the sections you’ve chosen
Tap either Full Report or Selected Sections to begin generating. Once complete, the app will open the generated report.
The main area of the screen displays the generated report. Across the top is a navigation bar with:
- Back button (left side)
- Table of Contents button (mirrors the section selection pop-up)
- Share button (uses Apple’s built-in share functionality, including saving as PDF)
- Notes drawer button
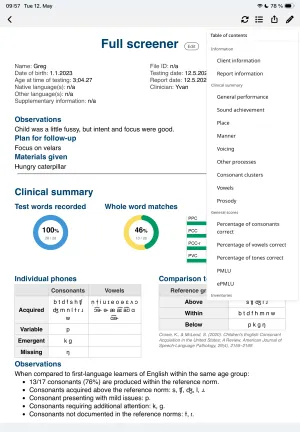
Tapping a section in the Table of Contents scrolls directly to that section in the report.
When you open the Notes drawer, you’ll see text fields for adding clinician notes.
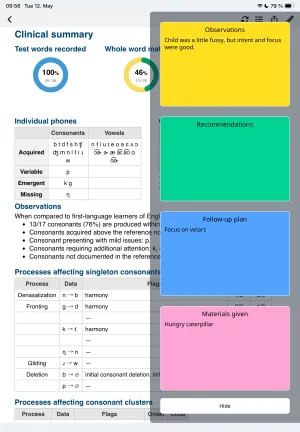
- Each field corresponds to a section of the report.
- Notes entered here will appear in their respective sections in the final report—whether viewed in the app or exported.
Once you’ve finished reviewing and adding notes, you can share or save your report in the format you need, such as PDF, directly from the app.