How to run a speech test
This guide walks you through selecting, configuring, and running a speech test in SpeechCatcher.
Setting up the test
Section titled “Setting up the test”-
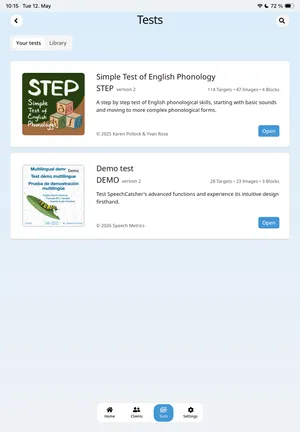
Navigate to the Tests Screen
From anywhere in the app, you can open the Tests screen by:- Tapping Tests on the home screen, or
- Selecting the Tests icon in the bottom tab bar.
-
Browse or Search for a Test
- The main section lists all available tests in card format.
- To search, tap the 🔍 icon in the top-right corner to open the search bar, then enter your keywords.
-
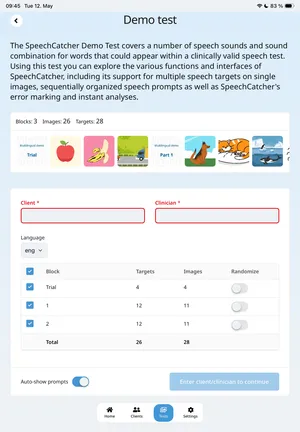
Open Test Details
- Tap the card for the test you want to run.
- The Test Details screen displays the test title, version, description, preview images, target lists, and target counts.
-
Set Up the Testing Session
Complete the session fields below the test information:Setting Required? Description Client Yes Select from your list of registered clients. Clinician Yes Enter the name of the person administering the test. Language No Select if multiple languages are available. Dialect No Select if multiple dialects are available. Randomize No Show test images in random order. -
Start the Test
When Client and Clinician are set, tap Start test (bottom-left) to begin.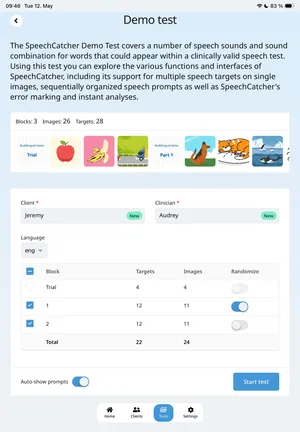
Running the Test
Section titled “Running the Test”When you tap Start Test, a confirmation screen appears showing:
- The test name (and language/dialect if applicable)
- A Begin button in the center
- A back button (top-left) to return without starting
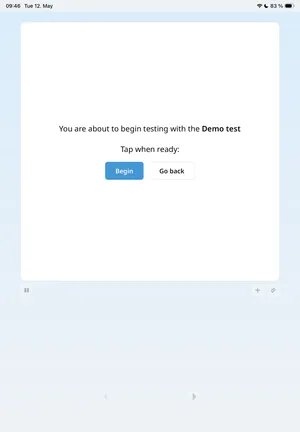
Press Begin to display the first test image.

Each image contains one or more targets:
- No targets: Tapping does nothing.
- One target: The whole image is the target. Tapping records the word.
- Multiple targets: Tap the specific area to record that target.
Interaction types:
- Short press: Marks the target as produced incorrectly.
- Long press: Marks the target as produced correctly.
At the bottom of the screen:
- Center button: Shows the target prompt (press again to cycle through prompts).
- Left/right arrows: Navigate between images.
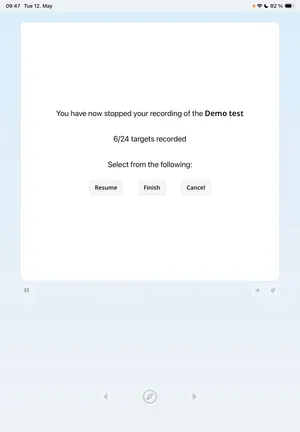
In the top-left corner, a Pause button lets you temporarily stop the test.
When paused, you’ll see:
-
Test name (and dialect if applicable)
-
Number of targets recorded so far (e.g.,
15/20) -
Options to Resume, Cancel, or Finish
-
Resume: Returns to testing after a short confirmation screen.
-
Cancel: Ends the session without saving.
-
Finish: Saves the recording and test data.
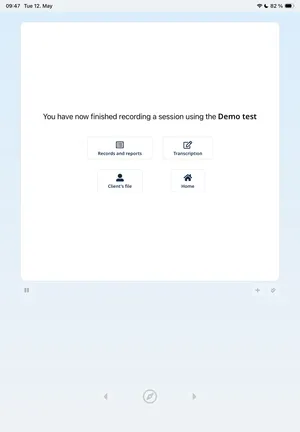
After canceling or finishing, you can choose to navigate to:
- Home screen
- Client screen for the tested client
- Records & reports screen
- Transcription screen for the first recorded record
At the end of a test, you’ll see a completion screen showing:
- Number of targets recorded (e.g.,
20/20) - If some targets were missed, an option to return and record them
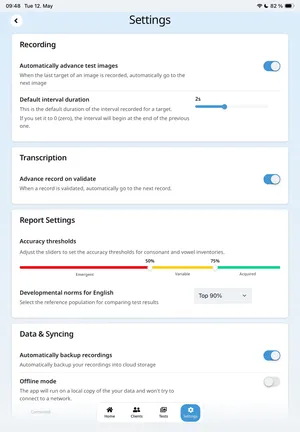
If Automatically advance test screens is enabled in settings, the app moves to the next image once all targets on the current screen are recorded.
This is enabled by default.
Once testing is complete, you can move on to transcribing your recorded data.