How to transcribe recorded data
Once you’ve recorded speech test data in SpeechCatcher, the next step is to transcribe it phonetically. This guide walks you through the transcription process.
Accessing the Recorded Data
Section titled “Accessing the Recorded Data”-
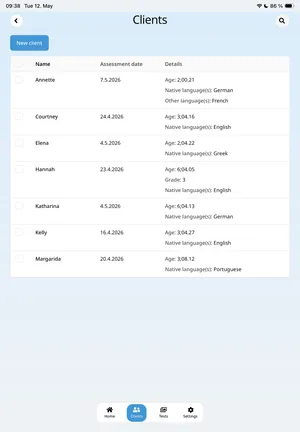
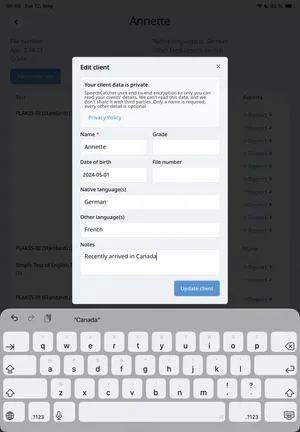
From the Clients screen, select the client you just tested.
-
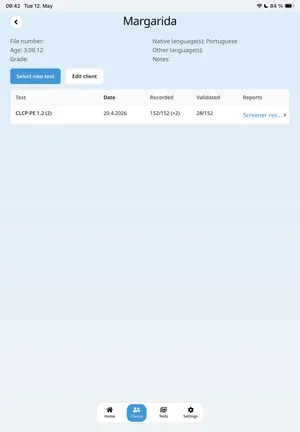
You’ll see a table listing all test sessions for that client.
-
Tap the desired session, then select View Data in the bottom-left corner.
-
This opens the Records & Reports screen for that session.

-
Tap any record in the table to begin transcribing.
The Transcription Screen
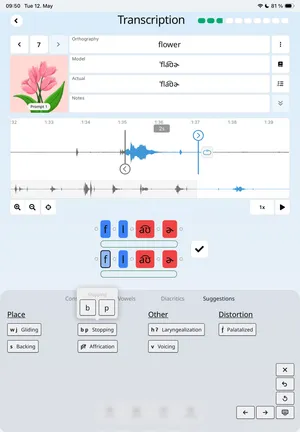
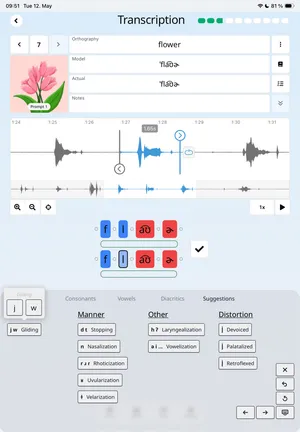
Section titled “The Transcription Screen”At the top, you’ll see:
- Left/right arrow buttons to navigate between records
- The record number you’re currently editing
- The image associated with the record
To the right, you’ll find four key text fields:
- Orthography — The word’s spelling in its language
- Model — The expected phonetic (IPA) representation
- Actual — The client’s produced form
- Notes — Any additional comments
Side Panel Buttons
Section titled “Side Panel Buttons”- Book icon: Shows alternate word forms with their orthography and IPA, based on language, dialect, or synonyms (e.g., “cat” and “kitty” in English).
- Data tiers button: Displays extra reference data (e.g., translations) if provided by the test creator. Disabled if none are available.
- Three-dot button: Reserved for future functionality.
Working with the Audio Waveform
Section titled “Working with the Audio Waveform”Below the text fields is the waveform view:
- The highlighted segment corresponds to the moment the target was tapped during testing.
- Drag the handles to adjust the segment’s start/end.
- Tap the segment to play it.
- Use the loop toggle to repeat playback.
Additional features:
- Zoom controls (bottom-left)
- Center view button to re-focus on the segment
- Playback speed control
- Play button for segment-only playback
The secondary, zoomed-out waveform below acts as a navigation preview.
Phone Alignment View
Section titled “Phone Alignment View”The phone alignment view displays both the Model and Actual phonetic representations, helping clinicians analyze speech production.
Editing Phones
Section titled “Editing Phones”- Tap a phone to open the IPA keyboard.
The keyboard includes four layouts:
- Consonants
- Vowels
- Diacritics
- Suggestions (context-specific, based on defined phonetic processes)
- Selecting a phone and pressing a key replaces the symbol.
- Using the small dots beside each phone lets you insert symbols without replacing existing ones.
Syllable Bars
Section titled “Syllable Bars”Below both transcripts are syllable bars:
- Tap a bar to see suggestions specific to that syllable.
- For tonal languages (e.g., Mandarin), you can also add or adjust tones.
Validating a Record
Section titled “Validating a Record”To the right of the phone alignment view is a large checkmark button:
- Pressing it validates the record, marking it as reviewed and ready for inclusion in reports.
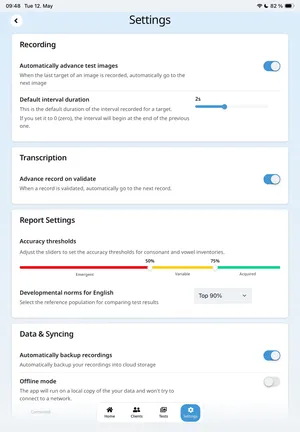
If Automatically advance records is enabled in Settings, the app moves to the next unvalidated record after validation.
This option is enabled by default.
Once all records are transcribed and validated, you’re ready to generate a report.